|
|
History of the plane
Serving during WWII, the Nakajima B6N was the Imperial Japanese Navy's standard torpedo
bomber. It first entered service in the Battle of the Philippine Sea in 1944, and most notably fought in
the battle of Okinawa on kamikaze missions. It was referred to as “Jill” by the Japanese allies.
In 1939 the plane was commissioned to replace the weak B5N, with more torque and power,
however the lengthy time of development and lack of experienced pilots to fly it resulted in the plane's
limited service, particularly because of its inferiority to the U.S. planes. It's time of service began with
troubled and extensive test flights in 1941 and was used through 1945. In all, 1,268 B6N's were built,
the majority of them being B6N2's.
The B6N had a wing span of almost 49 feet with a length of nearly 36 feet and could reach a
cruising speed of 207mph. With a crew of 3, the B6N could also hold two 7.7 type 2 machine guns,
one in the engine cowling and the other in the ventral tunnel as well one torpedo or up to 800 kg of
bombs.
Riveting and Irregularities
In order to emulate the expansion of the plane's metal and corrugation, the builder had to take it
upon himself to reproduce such details, rather than relying on the kit or any available extraneous
materials.
With his years of experience in model building, the builder has fine-tuned his choice of tools
for riveting: a sharp fine scriber with “teethed” razor blades; metal cogwheel or riveter; a no. 15
scalpel; and most importantly, patience.
Disregarding the kit's instructions, the builder took choice liberties in recreating the original
plane's rivets through studying photographs. It was also necessary to deepen the kit's existing recess
panel lines. Exaggerating these panel lines was essential at the start of assembly because during
scribing and polishing they would decrease in detail and cannot be recreated.
When a modeler begins riveting, there's no going back. It's a one-time-only process which must
be exact from the start. Any repair is very apparent on a finished model and decreases the level of
quality.
Once this detailing is complete, the builder then used a car rubbing compound, like Motip, and
polished the surface, almost endlessly, until it had a soft wavy look without any scalpel tracks.
Painting
After the riveting and irregularities, painting is the most important step in creating a realistic
bare metal surface. This is another feature that distinguishes experts from the novices, and the builder
has once again set himself apart in this area: he has successfully created a perfect replica of the
aluminum sheet metal of the real aircraft.
Requiring no less than two coats of paint, the builder first airbrushed a glossy base coat, and
then a second silver coat.
Then, polishing, polishing, polishing. The builder knew his job was complete when the
reflectivity of the surface metal was identical to the real aircraft's.
Usually, a varnish hides the wonderful metal shine, and thus the builder chose to only apply it
around the exhaust, bottom fuselage, wing tank covers and ailerons, all in order to further add to the
life-like details.
Further Assembly
To create the U.S. decals on the tail (the plane was captured and an American registration
number was applied), the builder needed to print it out on a decal form as the exact inscription wasn't
available on a purchasable decal.
The builder also replaced the original canopy with a Squadron Signal, which he separated into
sections and glued them onto the plane in opened positions, as to show off the incredibly detailed
cockpit.
After this, the undercarriage compartments, tail wheel, flaps, radio mast and the propeller where
the final touches.
A builder must have patience and experience to complete such an immaculate model, and the
final product really show cases his unique skill set in the riveting, surface irregularities, painting and
final assembly. Not only is are his abilities apparent on the entire plane, but we can especially see the
very subtle, but realistically created, corrugated metal showcased aft of the cockpit on the dorsal side of
the fuselage. Not only is this Nakajima a truly exceptional plane, but this model is truly a masterpiece,
built by a one-of-a-kind model builder who will never build again.
|

|
|
|
|
|
 |
|
| |
|
|
| |
 |
|
mouseover the thumbnail images to see a larger preview on the right
click the thumbnail image to view full size image on the top |
|
|
|
|
| |
|
|
|
|
|
|
Other Dogfighters:
(Click photo for more info)
|
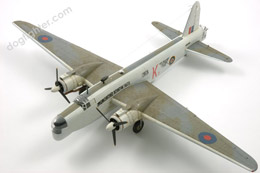
Vickers Wellington Mk. IC 1:72

|
Academy Sukhoi Su-27 1:48

|
Flettner Fl-165

|
messerschmitt me109 E-4 1:48

|
|
|
|
|
Sukhoi Su-35 1:48

|
Bell H-13 Sioux

|
|


